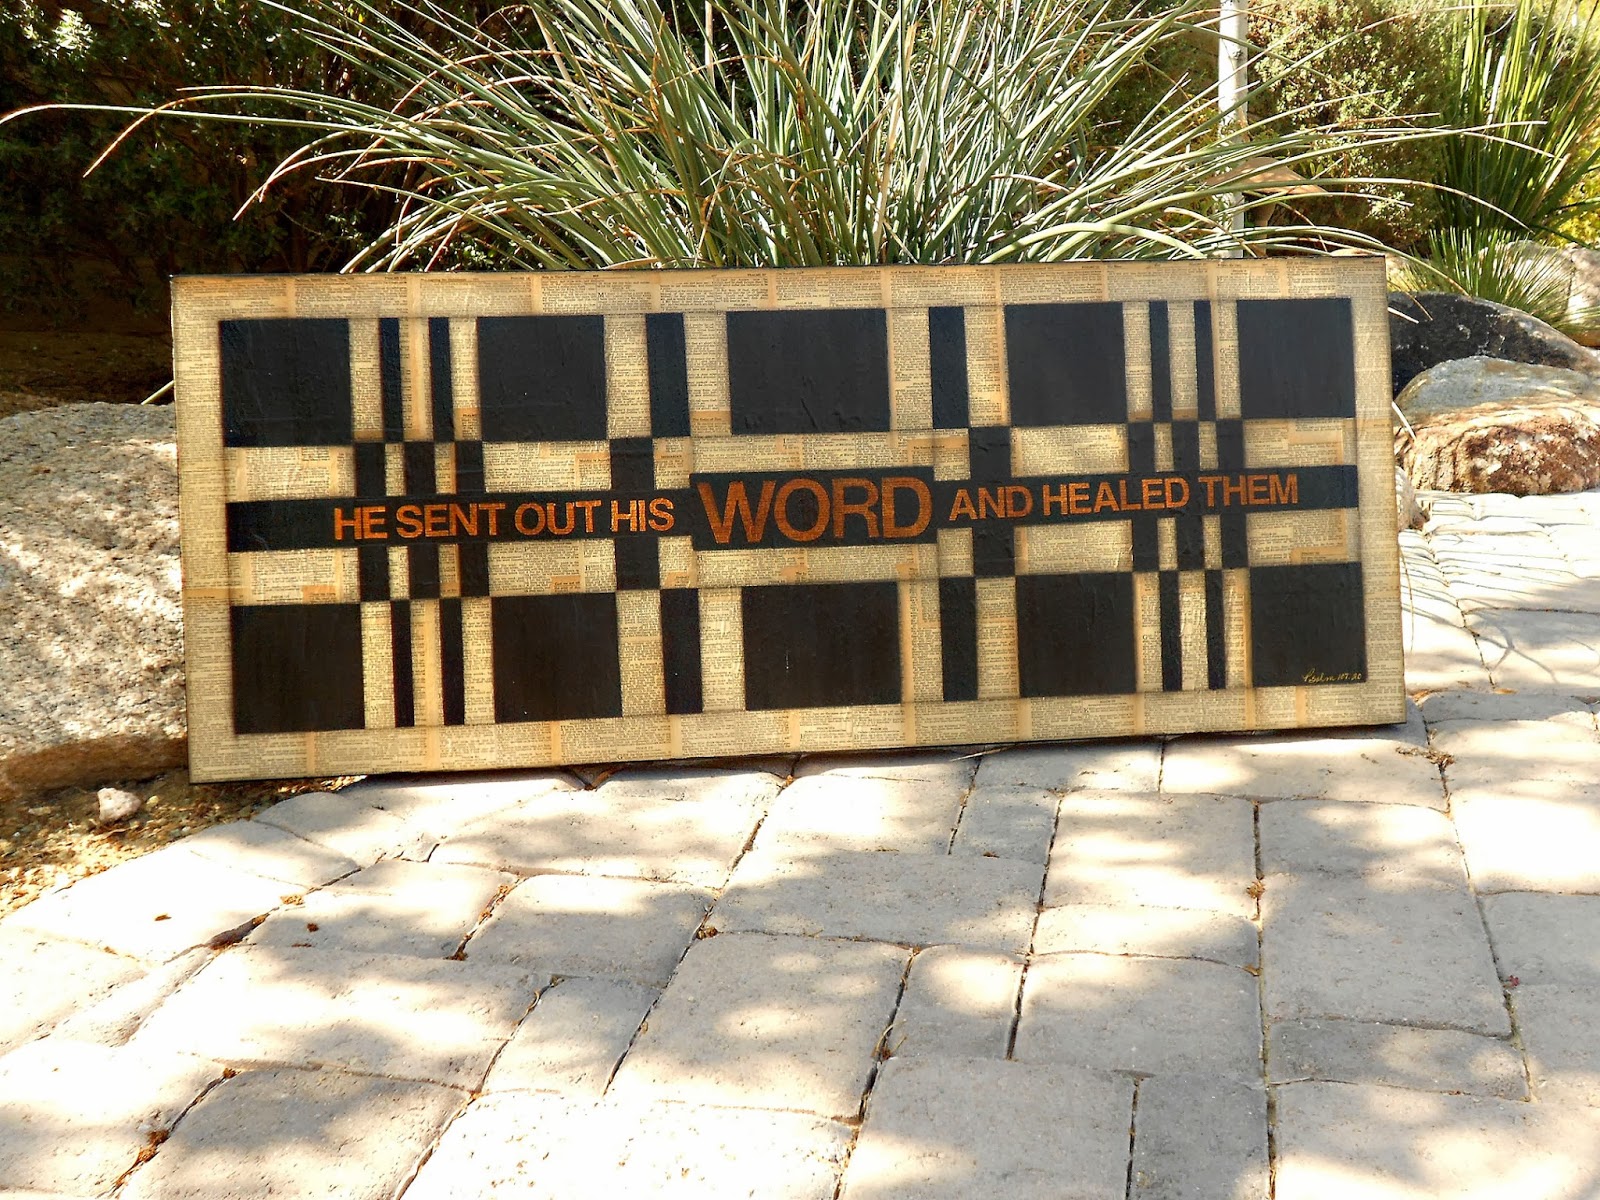
So, yesterday I told you I was working on a really BIG canvas - well, it is FINISHED!!!
I have never done anything this big or this linear before but I am super happy with how it turned out and I am ready to do another one!
This piece is called "His Word" and came from a Scripture I have been studying in Psalms. It is Psalms 107:20. The full verse is actually "He sent out His Word and healed them and saved them from the grave".
The entire canvas is covered with vintage Bible pages - I used the whole book of Psalms to cover this canvas. In the corner here you can see that I hand wrote the scripture, but as luck would have it (or maybe God planned it this way) the Bible page net to it is actually Psalms 107!
I thought I would show you the steps involved in case you would like to give it a try!
My supplies included:
16x40 deep profile gallery wrapped canvas
An old Bible
Lots of painters tape
Matte Medium
Black & Asphaltum acrylic paint
Vinyl sign letters
Paint brushes
Spray Matte Sealer
Clear Varnish
I created my design on just a piece of paper drawing it to 1/4 scale to fit on the paper (easy math on this canvas each inch equaled 1/4"). You will keep the border covered with the tape until the very end. This is hard because I kept wanting to pull it off to see how straight my lines were. You will also want to paint the sides of your canvas at this point.
TIP: let your canvas dry for at least 2 hours before you start adding your tape so you don't pull off any of your pages.
Just keep masking off each layer of your design and painting it. I wanted to add my scripture in the very center and I am no good at lettering so I used vinyl sign letters to make my words. I masked off the area and then painted it with a glaze (Asphaltum brown paint and water) so the print from the Bible pages would show through the words. Once the brown was dry I attached the vinyl letters and painted black paint over top. When it's all dry you can pull the vinyl letter right up and you will have your beautiful brown glazed letters showing!
Keep on going! I set a timer and let my paint dry for 30 minutes for each layer
It might be hard to see in this small photo but the addition of the charcoal pencil makes a HUGE difference. This step is well worth the time and the dirty fingers! The first picture shows the pencil added on the just the bottom half of the canvas.
I would love to see what you come up with if you give this a try!
My canvas is already hanging in my studio as a constant reminder that God loves me and that His Word does heal!
Okay one last picture. . . .
Just because it wouldn't be me if I didn't share my first calla lily bloom of the season!
Isn't she pretty?
Have a great weekend friends
till we meet again. . . .


No comments:
Post a Comment