
Hey friends I wanted to try to do a little photo tutorial on how to make the little Church Binder Covers for those of you that emailed me for the pattern. So let's see how well I do with this. . .

This is the cover we will be "making" today. Please excuse my photos as I didn't take time to edit them and make them "pretty"
Here are the materials you will need:
Fabrics
-
Cover - 17¾" x
11"
Lining - 17¾" x 11"
Inside Flaps -2@
13½" x 11"
Inside Pockets - 2@
9½" x 7¼"
Handles - 2@ 4" x
14"
Closure Flap - 5½"
x 4"
Other
-
Heavy Iron-on
Interfacing -1@ 16" x 9¼", 2@ 6" x 9¼"
Thread
2" of ½"
Sew-in Velcro
Buttons
Fusible Hem tape (for
cheaters)
A-5 Binder (Half Size Binder holds
5.5x8.5 paper)

This is the Cover fabric which is -17¾" x 11" - although I cheated and made my cover put of 3 pieces of fabric so I could have a contrasting spine or bottom. Just make sure your finished measurements are 17¾" x 11"

·
Iron Interfacing to wrong side of Cover fabric - set aside

·
Fold/press Inside Flaps fabric in half wrong sides together (folded size 6¾ x
11)
·
Iron Interfacing to wrong side of Inside Flaps (inside the folds, having
interfacing against folded edge and centered top/bottom) See photo above

This is what your Inside Flaps will look like when you are done

·
Fold/press the right raw edge of one Inside Pockets over ¼" towards the
back having the original fold at the top do the same on the next Inside Pocket only fold over the left raw edge. (the pocket with the folded right edge will go on the left of your finished cover and the pocket with the left folded raw edge will go on the right of your finished cover)

·
Lay each of the Inside Pocket pieces on top of each of the Inside Flap pieces matching the side folds and the bottom edges
·
Lay each of the Inside Pocket pieces on top of each of the Inside Flap pieces matching the side folds and the bottom edges
NOTE: this picture shows the flaps/pockets laying on top of the lining fabric - don't sew the flaps to the lining yet.

·
On the right Pocket/Flap piece you can sew vertical lines through pocket portion
to add pen holders (I do mine 1" apart giving me 6 pockets which are big
enough for 2 standard pens or one large marker)

·
Lay the finished Pocket/Flap pieces on the Lining
piece matching raw edges there will be a 4¼" blank space between the
folded edges of the flaps (the lining is the black/cherry fabric in the center here)
·
Sew flaps to Lining with ¼" seam

DO NOT sew down the inside edges of the flaps! Sew only around the 4 raw edges of the lining you need the flaps open to place your binder in there! See above picture
·
Set Lining
aside

·
Top stitch ¼" from edges on each Handle

·
Fold/press ¼" up on bottom edge of Closure Flap fabric then fold/press in
half lengthwise. Sew up sides and across top edge with ¼" seam. Clip
corners and turn right side out
·
Top stitch ¼" from edges on Closure Flap.

These are the pieces you should have now -
Your lining with the flaps and pockets attached,
your cover fabric with interfacing iron to the wrong side,
2 handles and 1 closure flap top stitched.
You are already to put this all together!!!
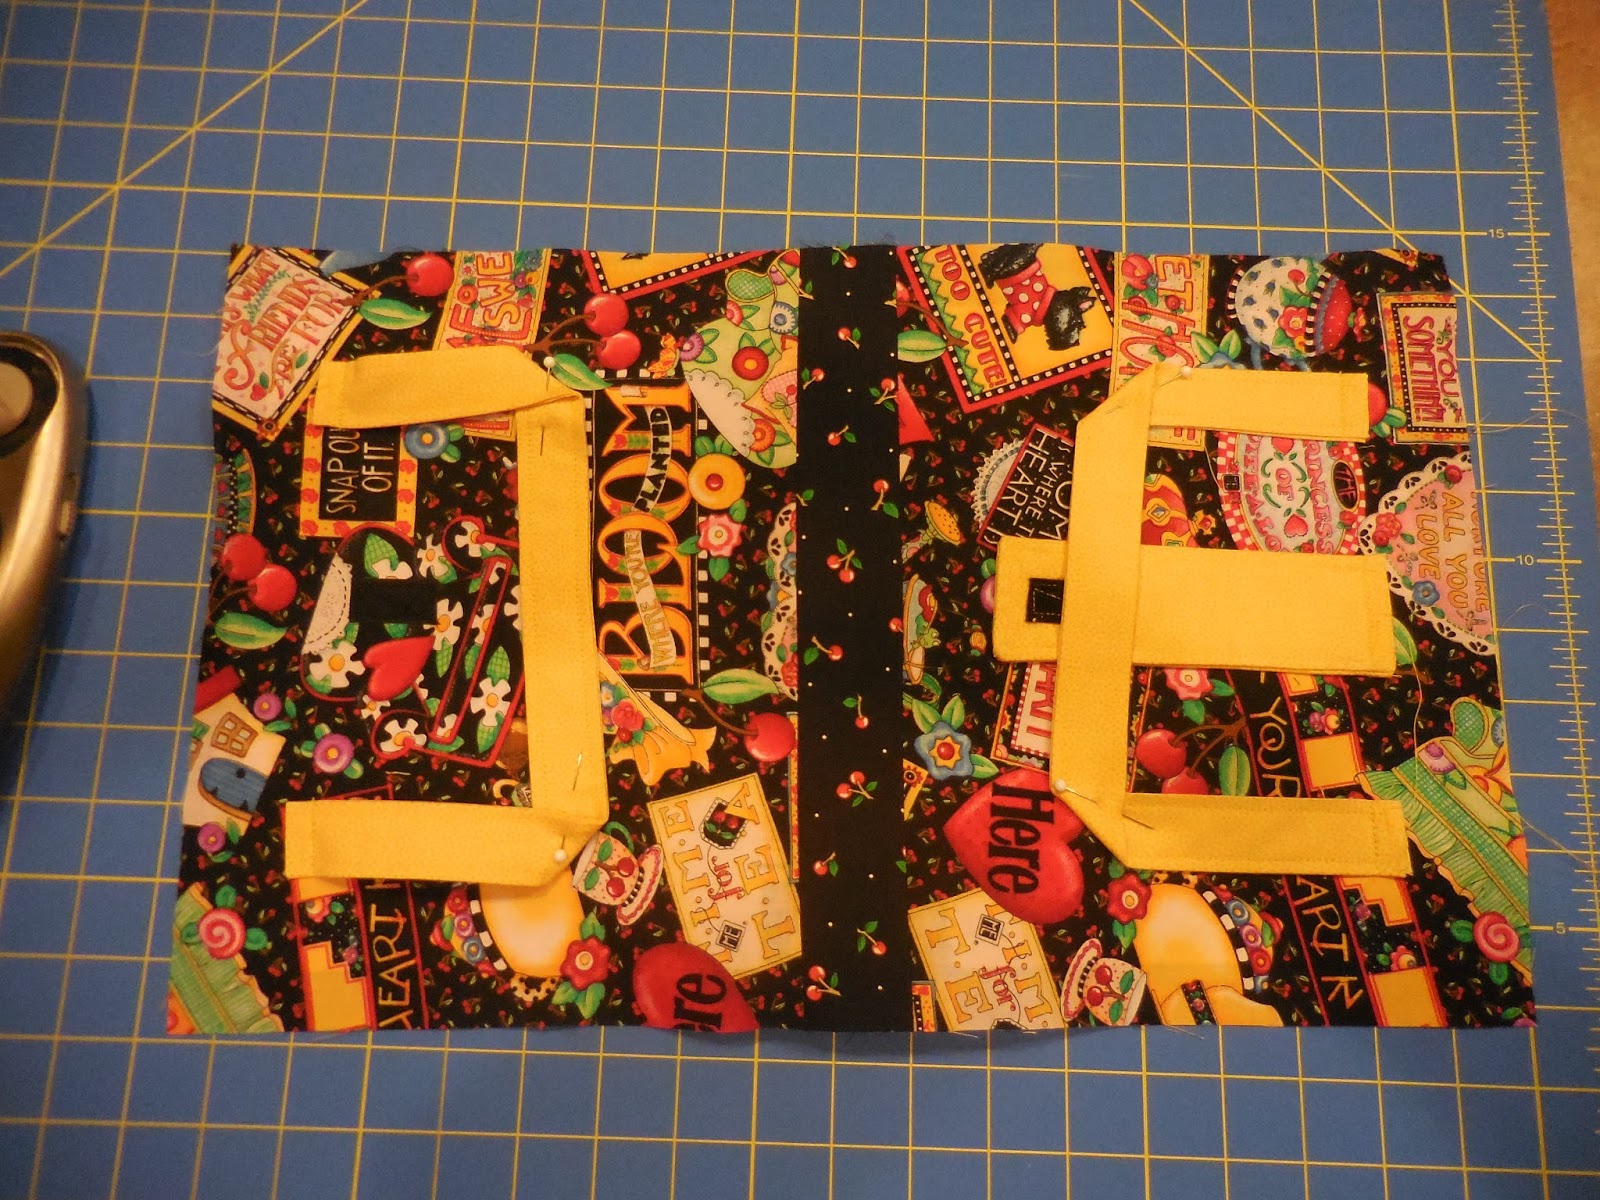
·
Attach Handles and Closure Flap to
right-side of Cover fabric. Place Closure
Flap at center of one short edge of Cover
approx 1½" from raw edge having raw edge of Closure Flap facing raw edge of Cover.
Place Handles with ends facing toward
raw edge of Cover approx 2" from
raw edge and 2" away from each side of Closure
Flap. Place second set of Handles
on other short edge of cover with the same placement.
·
Attach stiff half of Velcro between the
second set of Handles to match the
placement on the Closure Flap. NOTE: You see I have added the soft side of the velcro to the closure in this picture - don't do that. Sew it in once you are all finished so you can match up your velcro better!
·
Pin the Handles and Flap to the Cover to keep them out of the way while
sewing the Lining to the Cover.

Place the Lining on top of the Cover right-sides
together. Pin together

leaving a space on short edge that has the
Closure Flap for turning. You can see in the photo above I have 2 vertical pins with 1 horizontal pin between them. This lets me know where to start and stop sewing so that I don't accidentally sew the whole thing shut!

stitch lining and cover together with a ½" seam

Clip corners and trim away some of the thickness


Yes, it will look like this balled up mess!!! Just take your time straightening it out.

Pick your corners with a pin to get them nice
and sharp and press

·
Now you can either slip-stitch the
opening closed OR you can cheat like me and use fusible hem tape and your iron
to close it up

 ·
Pull your handles and Closure Flap up
and pin them in place
·
Pull your handles and Closure Flap up
and pin them in place
· Top stitch ¼" from edge all the way around catching your Handles and Closure Flap up in that stitching


· Add your soft velcro to the closure flap. Embellish your Handles and Flap with
buttons
·
You are now finished and ready to add
your binder to your pretty purse!
The Front

The Inside with binder

The Spine/Bottom

The Back
I hope this made sense and that you will enjoy making your own little Binder Covers!
Hey you can also leave off the handles for a less "cutsie" clutch style - see picture below


Have a great day!!! Till we meet again!


